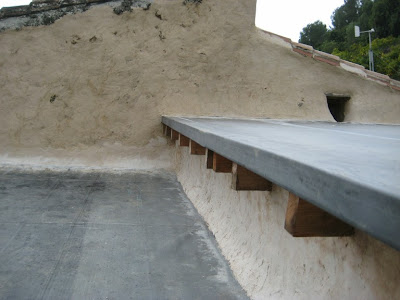
Above is a reminder of the problem that needed to be solved, in the picture you can see the light clay straw wall has been built up to the level of the lower roof leaving a gap between the lower roof and the upper roof.
The narrow width of the light clay straw wall (it is a none load bearing interior wall) was not sufficient offer the degree of protection needed as an outside wall, what I needed was something reasonably light in weight but strong to bridge the gap between the two roofs.
I mentioned I would be using cob wood to bridge this gap and it went quite well.
Most of the structural support for the cob wood is taken up by the lower roof and the unseen wooden supports on top of the light clay straw wall (attached to the interior uprights)
From the inside it looks like this -
A lime plaster -
And when the lime plaster has dried out and cured completely (it has been raining here on and off for weeks!) it will have a lime wash finish brushed on.
In between the wet weather I am now lime plastering the walls.
I guess render is the correct word for outside plaster, as you can see it all looks a bit of a mess with the untrimmed roof and ragged plastic protecting the walls but as soon as the lime render is on and cured and lime washed it will all look great!
Lime is a wonderful material to use, lime render has a soft rounded look and lime wash is a relaxing white, not at all clinical, but much more of the drama of lime in the next update!


No comments:
Post a Comment