Tuesday, 5 February 2013

Post And Beam Strawbale Extension Part 5


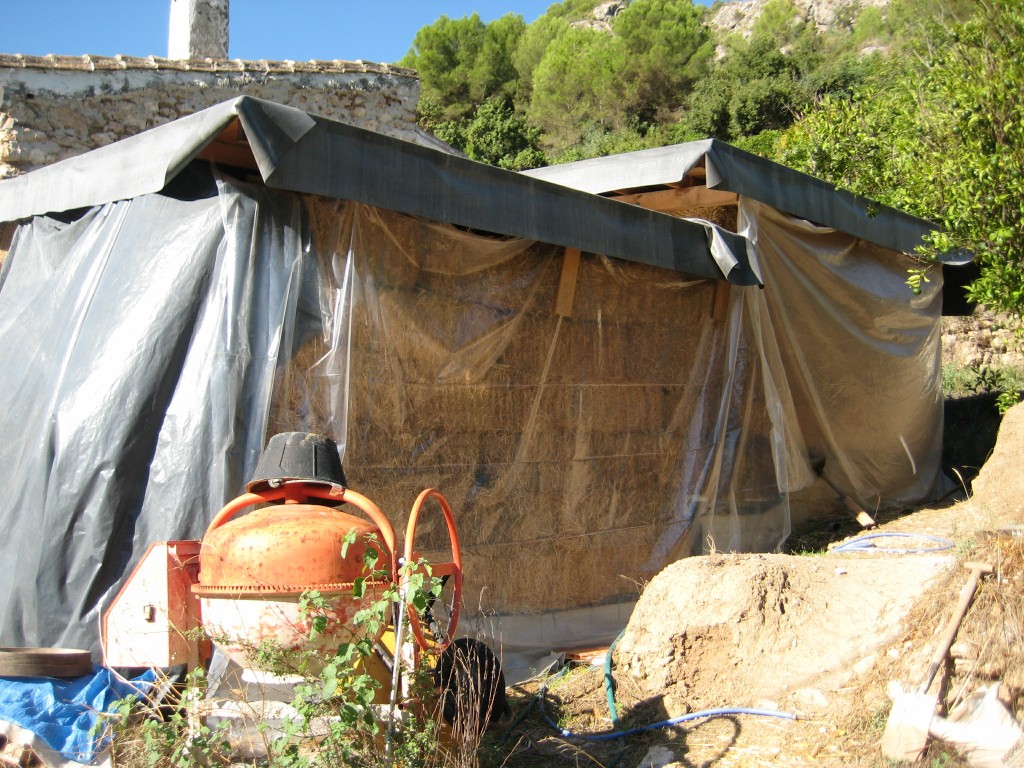
Above is a reminder of the problem that needed to be solved, in the picture you can see the light clay straw wall has been built up to the level of the lower roof leaving a gap between the lower roof and the upper roof.
The narrow width of the light clay straw wall (it is a none load bearing interior wall) was not sufficient offer the degree of protection needed as an outside wall, what I needed was something reasonably light in weight but strong to bridge the gap between the two roofs.
 I mentioned I would be using cob wood to bridge this gap and it went quite well.


Most of the structural support for the cob wood is taken up by the lower roof and the unseen wooden supports on top of the light clay straw wall (attached to the interior uprights)

From the inside it looks like this -


A lime plaster -


And when the lime plaster has dried out and cured completely (it has been raining here on and off for weeks!) it will have a lime wash finish brushed on.
In between the wet weather I am now lime plastering the walls.


I guess render is the correct word for outside plaster, as you can see it all looks a bit of a mess with the untrimmed roof and ragged plastic protecting the walls but as soon as the lime render is on and cured and lime washed it will all look great!
Lime is a wonderful material to use, lime render has a soft rounded look and lime wash is a relaxing white, not at all clinical, but much more of the drama of lime in the next update!

Post And Beam Strawbale Extension Part 4


The plastering of the bale walls is the most enjoyable job so far on this project.
The sand, clay earth and chopped straw plaster is mixed up in a cement mixer and with a pair of rubber gloves I slap it on and work it in to the straw wall to ensure a complete covering of me and the wall in mud! This first coat of clay helps preserve the straw, no one is quite sure why but as clay is a moisture regulator it is thought it draws out any moisture from straw bales.
The problem I did encounter was running out of sand, and at that point in time our flood damaged road had not yet been fixed so I have only been able to do half of the outside wall.


While I waited for the road to be repaired I decided to make the inner wall separating the two rooms out of light clay straw, this requires no sand.
Straw, coated in a clay slip (clay melted in water) is left to dry slightly over night.


 and then packed down in a form attached to posts in the wall.


After the clay straw is packed down a post is inserted on top to bear the weight of the next load and hold the formed clay straw in place.


Remove the plywood form and -


This is the wall finished up to daylight. From here upwards I am going to use cobwood to close off the outside, what cobwood actually is you can find out in the next update, thanks for visiting and sharing the slow progress of me hand making a house.

Post And Beam Strawbale Extension Part 3


As you can see from the photo above all the straw bales are finally in place and covered in plastic to protect it from the unusual weather we have been having, it isn’t meant to rain here in September!


 As you can see each bale is tied tight to the bale beneath it, this creates a strong stable wall. Each bale gets compressed down on to the bale beneath it. The string is connected to the cross beam at the top and the upright posts by hooks, it is now impossible for the bale walls to move.
This unorthodox method of bale attachment using string has many advantages, the first is that it easy for a one man operation, no lifting bales on to rebar, or problems with rebar when you get to the top of the wall under the roof.
As the wall goes up it is stable, one can lean ladders on it and climb all over it.
It compresses the bales one by one, the importance of this is lost on my extension that is post and beam connected to a stone cottage at one wall, but for a complete straw bale construction of at least four walls I would think using string as I have done would make the solid base for the roof as in the ‘Nebraska’ style load bearing walls system of building bale houses. There being no necessity for the post and beams holding up the roof.
The next job is plastering the outside and cobbing in the top where the roof meets the wall. An extra straw cob mix will bridge the gap between the top of 
 the bale wall and the underside of the roof.


I am in the middle of experimenting how to do the plastering.
Above is an image of a clay earth, sand and chopped straw mix, put on by hand and then with my thumb pushed right into the bales (hence the holes) to key it in.
On top of this will go another mix of the same but slightly smoother, without the holes, on top of that will go a thin layer of lime plaster which will then be lime washed.


To be continued

Post And Beam Strawbale Extension Part 2


Last winter the road to our village was washed away in heavy rains, above is my trusty ex military landrover  that enables us to get in and out of our, home across a narrow country track. Why I mention it is because the only supplies, including building supplies we can get has to come in via the landy.
This means only six straw bales at a time !
So here is a pic of the progress so far.


The first obvious problem I came across was the size of the bales, they can vary from 95cms long to 125cms long. This is not a big problem as I just have to resize the bales but it is time consuming.
Resizing the bales is quite simple, one just has to re tie the bales to the length one needs by poking a new piece of string through the bale at the required length with a piece of narrow iron bar.
This image shows the bales each tied down to the next, this is working out very well and making a secure stable wall , though it took a bit of fiddling to work out how to tie the string without losing the tension needed.


It is a two hour round trip at the moment to get six bales so progress is a little slow but little by little we are getting there!
To be continued…..

Post And Beam Strawbale Extension part 1

Developing our creativity is how we develop our personal growth and how we can value ourselves and how others can value us”

Part of my own personal creativity is the house I am renovating/building here is Spain.
I feel that the first step in sustainable building, which is what we are trying to achieve here, is to start with a building already built, therefore not requiring the use of yet more land to cover with concrete.
What I am showing here is the steps taken so far in the Post and Beam Straw Bale extension I am building on the north side of our house.
Step 1.
Landscaping the ground to make two terraced flat spaces to build on.


2 flat platforms (dug out by hand)

This was done by hand using a pick ax and a spade. It is laborious work but does not require surrounding trees and land to be destroyed to make access for a mechanical digger.
Another benefit of working by hand is that clay rich soil, rubble, large rocks and top soil can all be separated into their own specific piles, with the exception of the top soil, everything else will be used back in the build. A pain to do at this stage but if you are making a ‘handmade’ house it pays dividends later when building.

Step2
Digging out the strip foundations.
I decided to make strip foundations as most of the build is on solid rock.


Strip Foundation

The foundations are dug wider than the straw bales they will support.
Step 3
Fill the strip foundations with rubble for good drainage, and support for the stem wall.


Rubble trench

Step 4
Pour some concrete into the strips and lay a stem wall. For the stem wall you can see we 
have used two rows of concrete blocks .


stem wall

After the blocks were laid, concrete pads were put in for the posts to stand on.


concrete pad

In this photo you can see the different floor heights of the rooms with the simple posts and beams in place. The bags of gravel were put in before any block work was done to save me having to wheelbarrow tons of gravel in to use as a base for the flooring.

Wall and beams built around 
 pre-placed bags of gravel

Another photo of the posts and beams showing the two levels of roof


Post and Beams

Step 5
The roofs, tongue and groove, insulated and covered with EPDM roofing.


EPDM

They have not been edge trimmed yet to offer greater rain protection while building the Straw Bale walls.
The plan is to eventually create green living roofs on top of the EPDM.


Roof beams and tongue and groove.


Window Box

Step 6
Here you can see one of the boxes made to hold the window in place, at the moment there is no supporting beams for the bales that will go above the window

Step 7
The blocks have a waterproof membrane on and the ties to hold down the first row of bales have been put in.


Stem Wall with membrane and bale ties in place.


This is as far as I have got so far, the ties are my own idea and we will have to see how well they work.
To be continued …………